6 Transitioning from the “Classic” Interface to the “Portal”
The new Emulab portal interface is a custom version of the CloudLab interface, so if you are familiar with that interface, using the Emulab portal will be easy! The portal currently supports the most commonly used features of the classic interface, with more features ported on demand. The classic interface should be considered deprecated, with no new features being added. It will continue to be supported until all important features have been moved to the portal interface.
The remainder of this section covers new and improved features that the portal interface offers over the classic interface, features currently missing from the portal interface, and how to convert an existing experiment into a portal experiment.
6.1 New and Improved Features of the Portal Interface
Besides a much updated look and feel, the portal interface offers significant new features and improvements to existing features.
6.1.1 Profiles
One important change that is more than just an interface issue, is the clear delineation between an experiment’s description and its instantiation.
In the classic interface, the term “experiment” is used to refer to both: experiment descriptions and instances can be created and destroyed together or, the experiment can be created just as a description and then “swapped in” (instantiated with resources) and “swapped out” (resources freed) repeatedly.
Through the portal, experiment descriptions are now known as profiles and the term experiment is used to refer to a running instance of a profile. Think of a profile as a “swapped out” classic experiment and an experiment (or instance) as a “swapped in” classic experiment.
The portal offers a variety of ways in which to create new profiles, including a web-based GUI and a Python-based scripting library. See the section on creating profiles for details. In addition, the Emulab portal provides its own method for converting classic experiments to profiles.
The profile representation of an experiment is different from that of the classic experiment. In the classic interface, experiments are described using ns-2, a network simulator scripting language based on TCL. The portal represents experiments at the base level as GENI RSpecs with the Python-based geni-lib interface available for scripting experiments. As described in the conversion section below, the portal can automatically convert classic ns-2 experiment descriptions into geni-lib based profiles.
In addition to the hardware and software resources required by an experiment, a profile also contains various metadata. The Description and Instructions fields permit you to provide additional information to the user of a profile. These fields support Markdown formatting allowing more expressive text. Classic experiments allow only a short, ASCII-only description.
Profiles can also have parameters with descriptions and default values. This permits customized instantiations from a single profile. For example, you can have parameters to specify the number or types of nodes in an experiment. In classic experiments this customization is accomplished by setting TCL variables in the NS file. Using a different value for the variables entails either modifying the experiment while it is swapped out or creating a new experiment with different values for the variables. With profile parameters, values are provided through the interface at instantiation time.
By default, profiles have the same visibility that classic experiments
do—
6.1.2 Web-based Interaction with Nodes
The portal page for an active experiment has a dashboard allowing interaction with all nodes. You can fire off in-browser console or SSH sessions, reboot, and view activity graphs.
6.1.3 Disk Images
Custom disk images are now created by taking a snapshot of an
experiment node or cloning an existing experiment to create
a new profile.
The disk image format has not changed—
6.1.4 Versioning
Both profiles and disk images are now versioned. Whenever you make a change to a profile, you create a new version of that profile. Whenever you take a snapshot of a node running a custom image, you create a new version of that image. When using a profile or image and no explicit version is specified, you get the most recent version. You can delete old versions of images and profiles (subject to some constraints). Deleting the current version effectively “rolls back” the profile or image to the previous version.
6.1.5 Experiment Extensions
The portal interface has a more rigorous procedure for extending a running experiment. In the classic interface you can extend a running experiment by modifying the “Max Duration” setting within a small range (0 - 120 hours). Longer extensions require an email exchange with the admins. In the portal interface, you request an extension via the web interface with shorter extensions being approved instantly and longer extensions automatically forwarded to admins for their consideration. Be aware that even short extensions may not be possible if the extension would conflict with a future reservation (described below). See the section on extending experiments for more information.
6.1.6 Resource Reservations
A major new feature supported via the portal interface is the ability to automatically reserve node resources at a future time. Emulab has traditionally been a first-come-first-serve, best-effort facility and reserving nodes required prior arrangement with Emulab staff. Through the portal, you can now ensure that a given number of nodes of a specific type will be available during a future time window. See the section on reservations for details.
6.2 Classic Features Not Currently Supported in the Portal
A number of prominent Emulab features are not currently supported via the portal interface. These include:
Events. The Emulab event system is not currently exposed through the portal interface. Specifically, you cannot schedule events from a profile. There is also no access to the program agent, traffic generator, or dynamic traffic shaping as those all use events to control execution.
Modifying a Live Experiment. The classic interface allows you to modify the description (e.g., network topology or node OSes) of a running experiment. This is not supported under the portal interface.
Batch Experiments. Automated execution of experiments via the batch system is not supported. Portal experiments can include “startup services,” but there is no current equivalent to starting an experiment when resources become available and then automatically terminating it when done.
Asymmetric Link Shaping. The classic interface supports the ability to shape a link with different characteristic (BW, latency, loss) in each direction. The portal interface only allows specification of one set of characteristics that apply in both directions.
6.3 Converting an Emulab experiment to a Profile
If you have no classic Emulab experiments (swapped in or swapped out) then you can skip this section and return to the getting started section.
The converter does not support all Emulab NS extensions, only those most commonly used by users.
The conversion process is not a source-to-source translation, rather it works by interpreting the NS script to generate state for the Emulab DB and then generating the geni-lib script from that state. From a practical standpoint, what this means is that if you use TCL loops, conditionals or variables in your original description, those will not appear in the resulting geni-lib script–loops will be unrolled, conditionals evaluated, and variables bound to fix values.
On the “Profiles” tab, the list of classic experiments will show only those that are swapped out. On the “Experiments” tab, it will show only those that are swapped in.
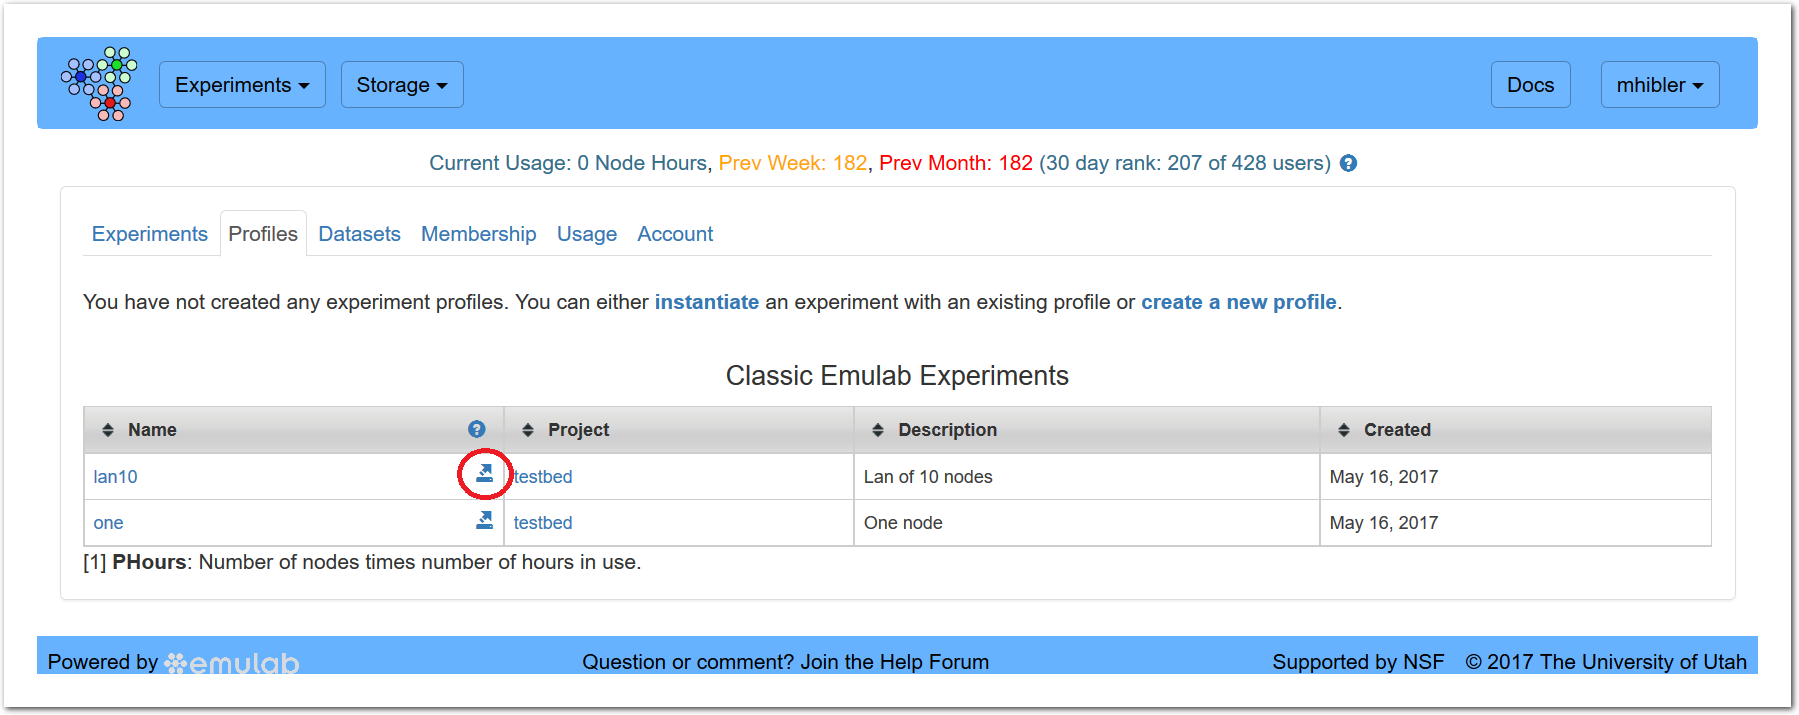
Clicking on this icon will start the conversion process for that experiment. The process will take anywhere from seconds to a minute or more depending on the complexity of the experiment description. After conversion, you will see:
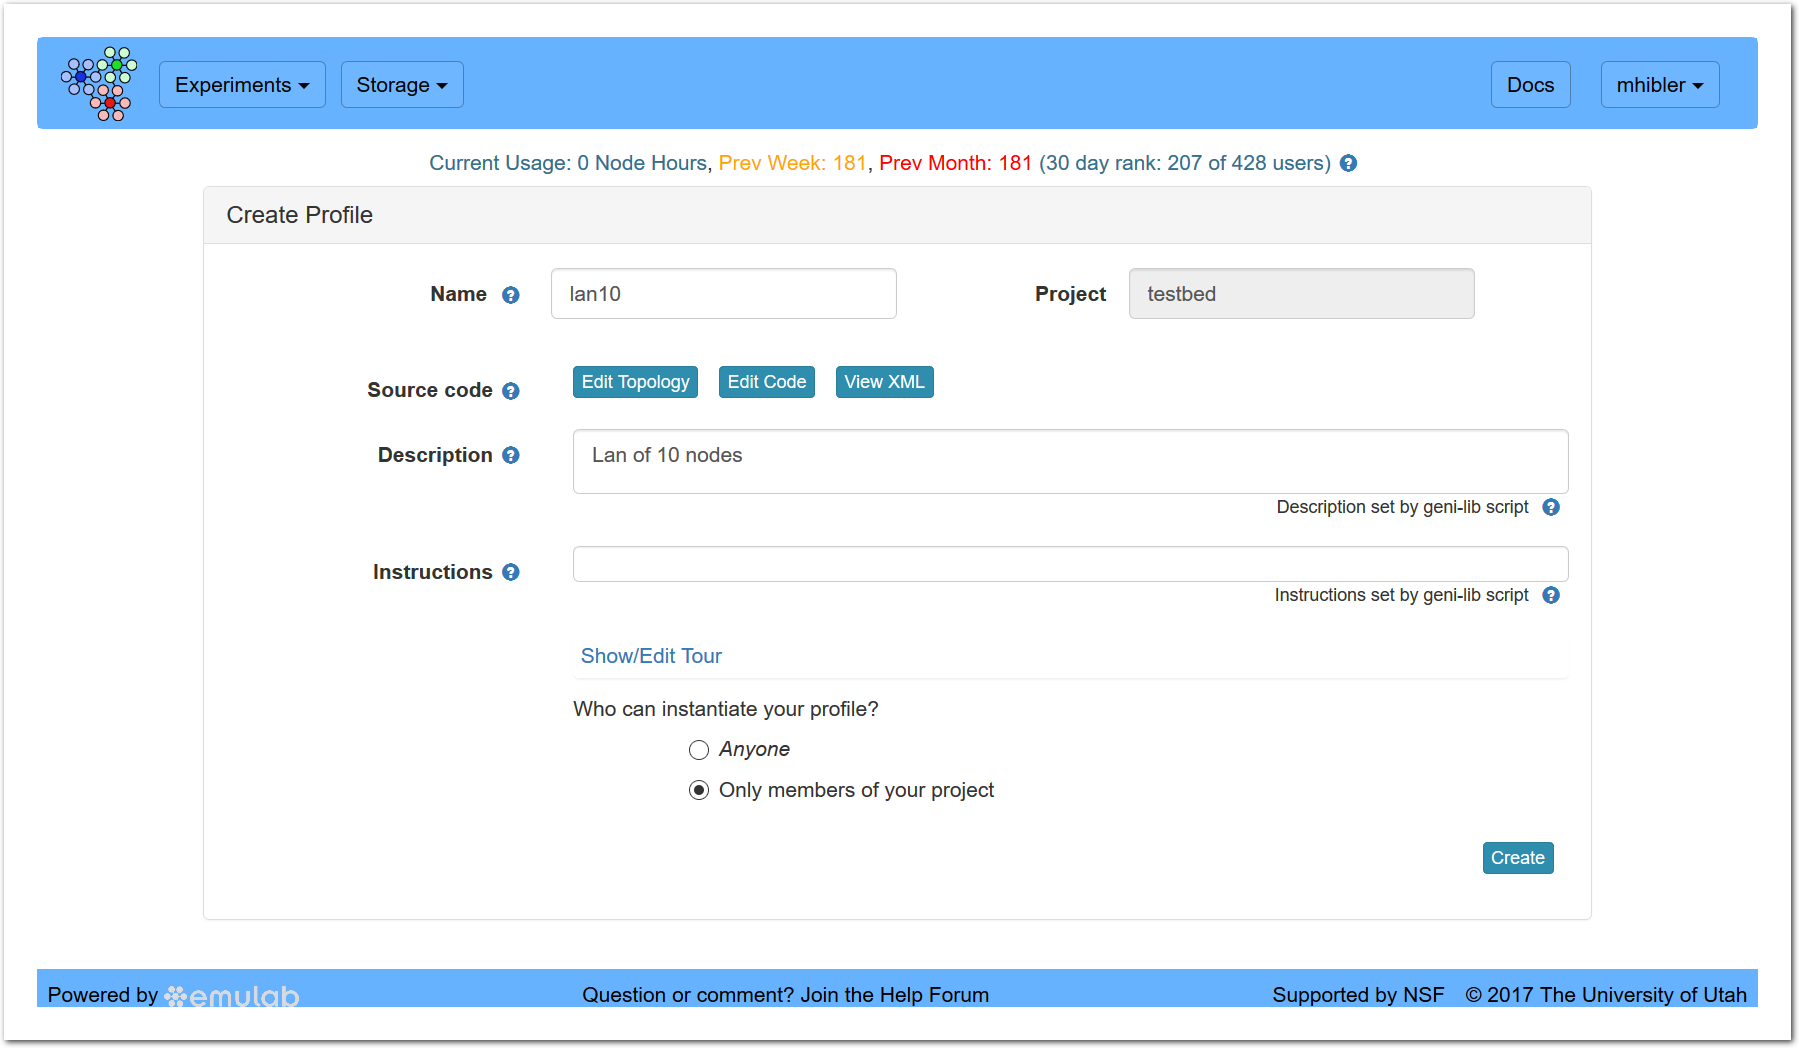
Typically, all you would do at this point is to click “Create.”
However, you may want or need to change the profile name if you don’t like the default (same as the classic experiment name) or if the creation fails because the name is already taken. You may also want to examine, or even modify, the new profile prior to actually creating it. Use either the “Edit Code” or “Edit Topology” buttons for this. The former allows you to modify the python/geni-lib script representation, the latter fires up the embedded Jacks GUI.
After clicking “Create,” you will be taken to a new page:
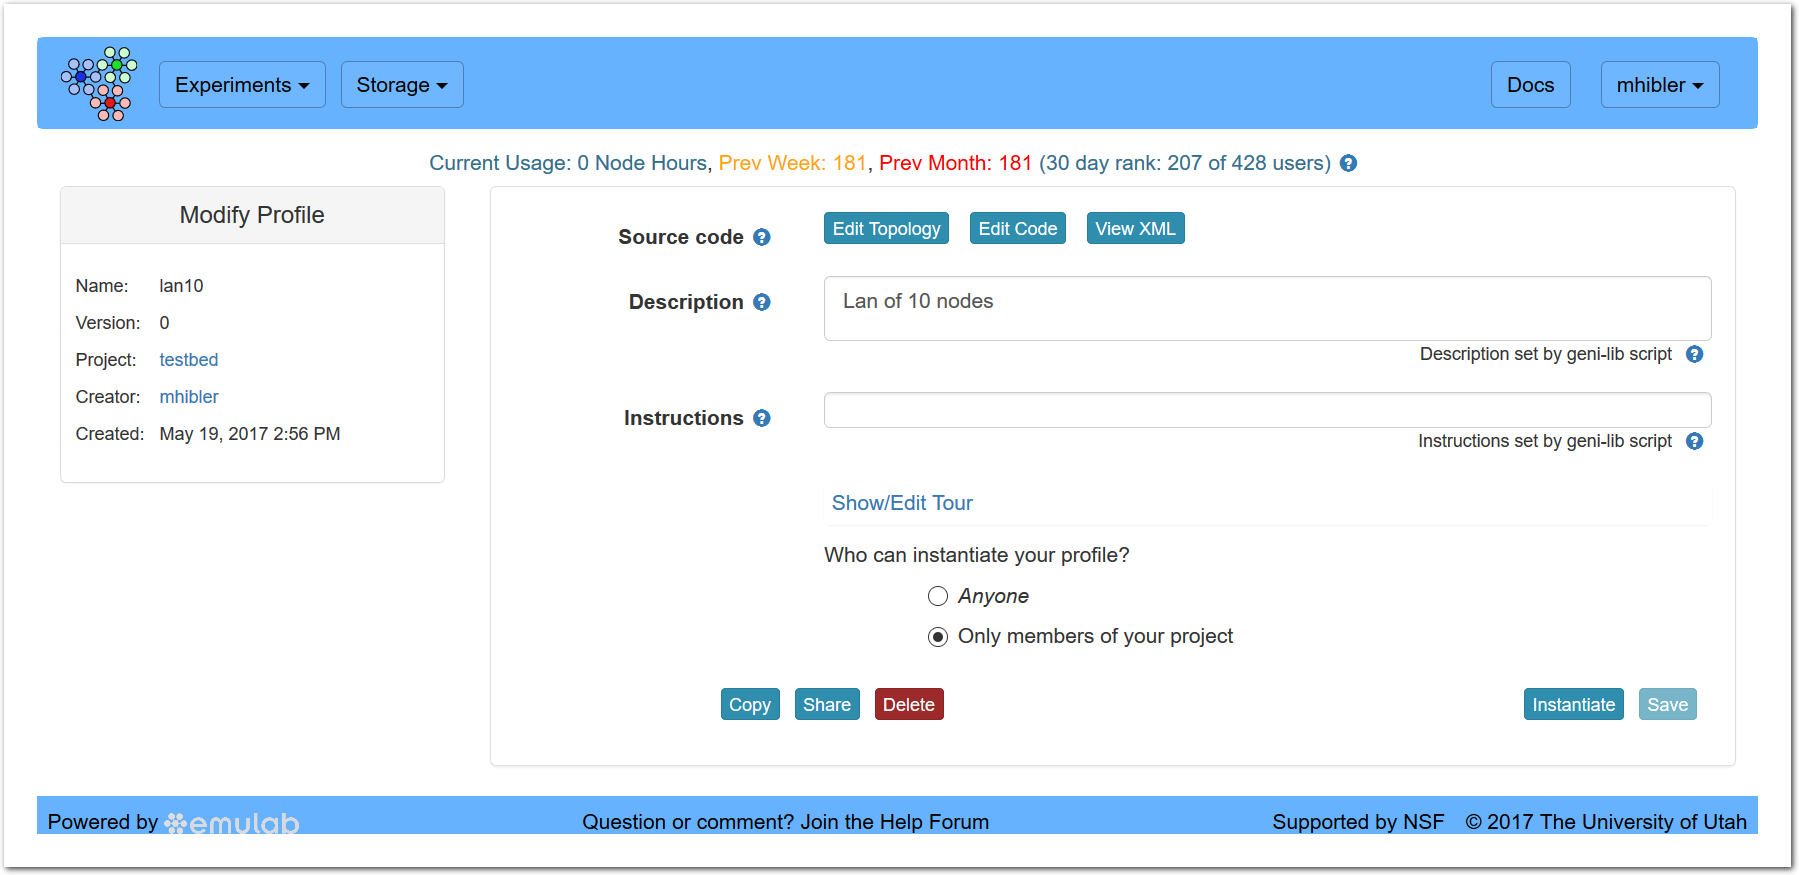
showing details about the new profile (on the left) and allowing you to further edit the profile, copy or delete it.
The first step is skipped because the created profile is automatically chosen and the second step because converted NS experiments have no parameters.
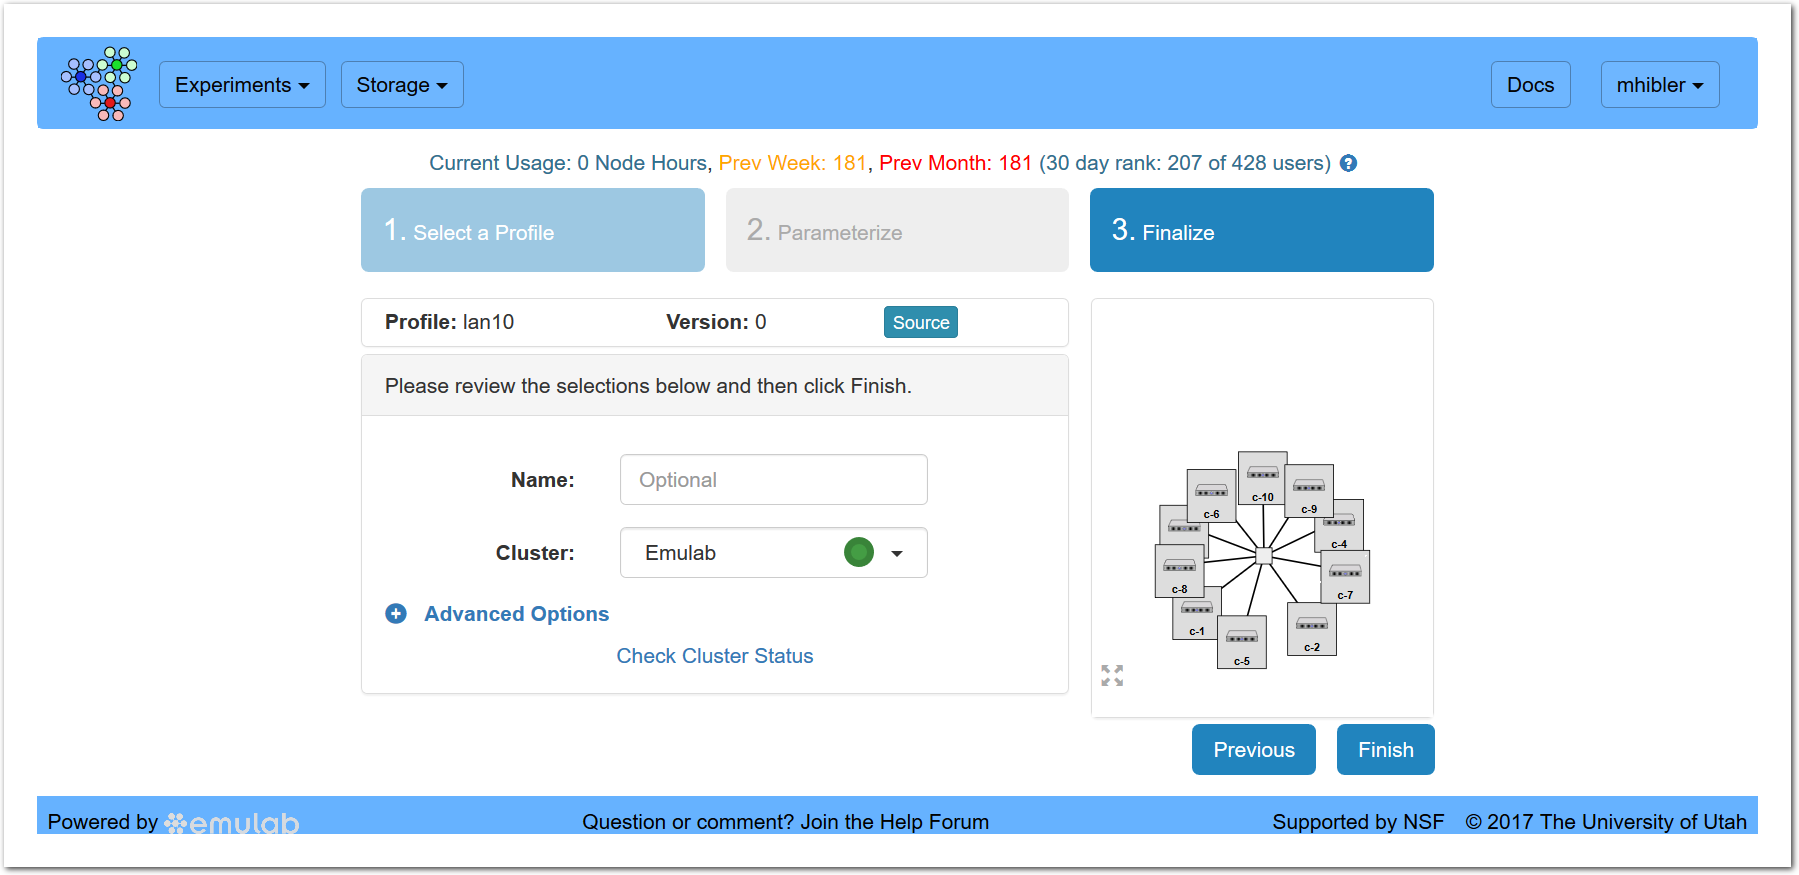
where you can optionally name this instance and then click “Finish.” Once instantiated the node icons should turn green as they finish configuring and the experiment state should change to “ready” and you will be off and running!

From the “Topology View” you can interact with the experiment. By clicking on a node in the topology view as shown, you can perform a variety of useful actions including: starting an in-browser shell or console window, rebooting, or taking a snapshot.
Going to the “List View” tab presents you with a more Emulab-like listing:
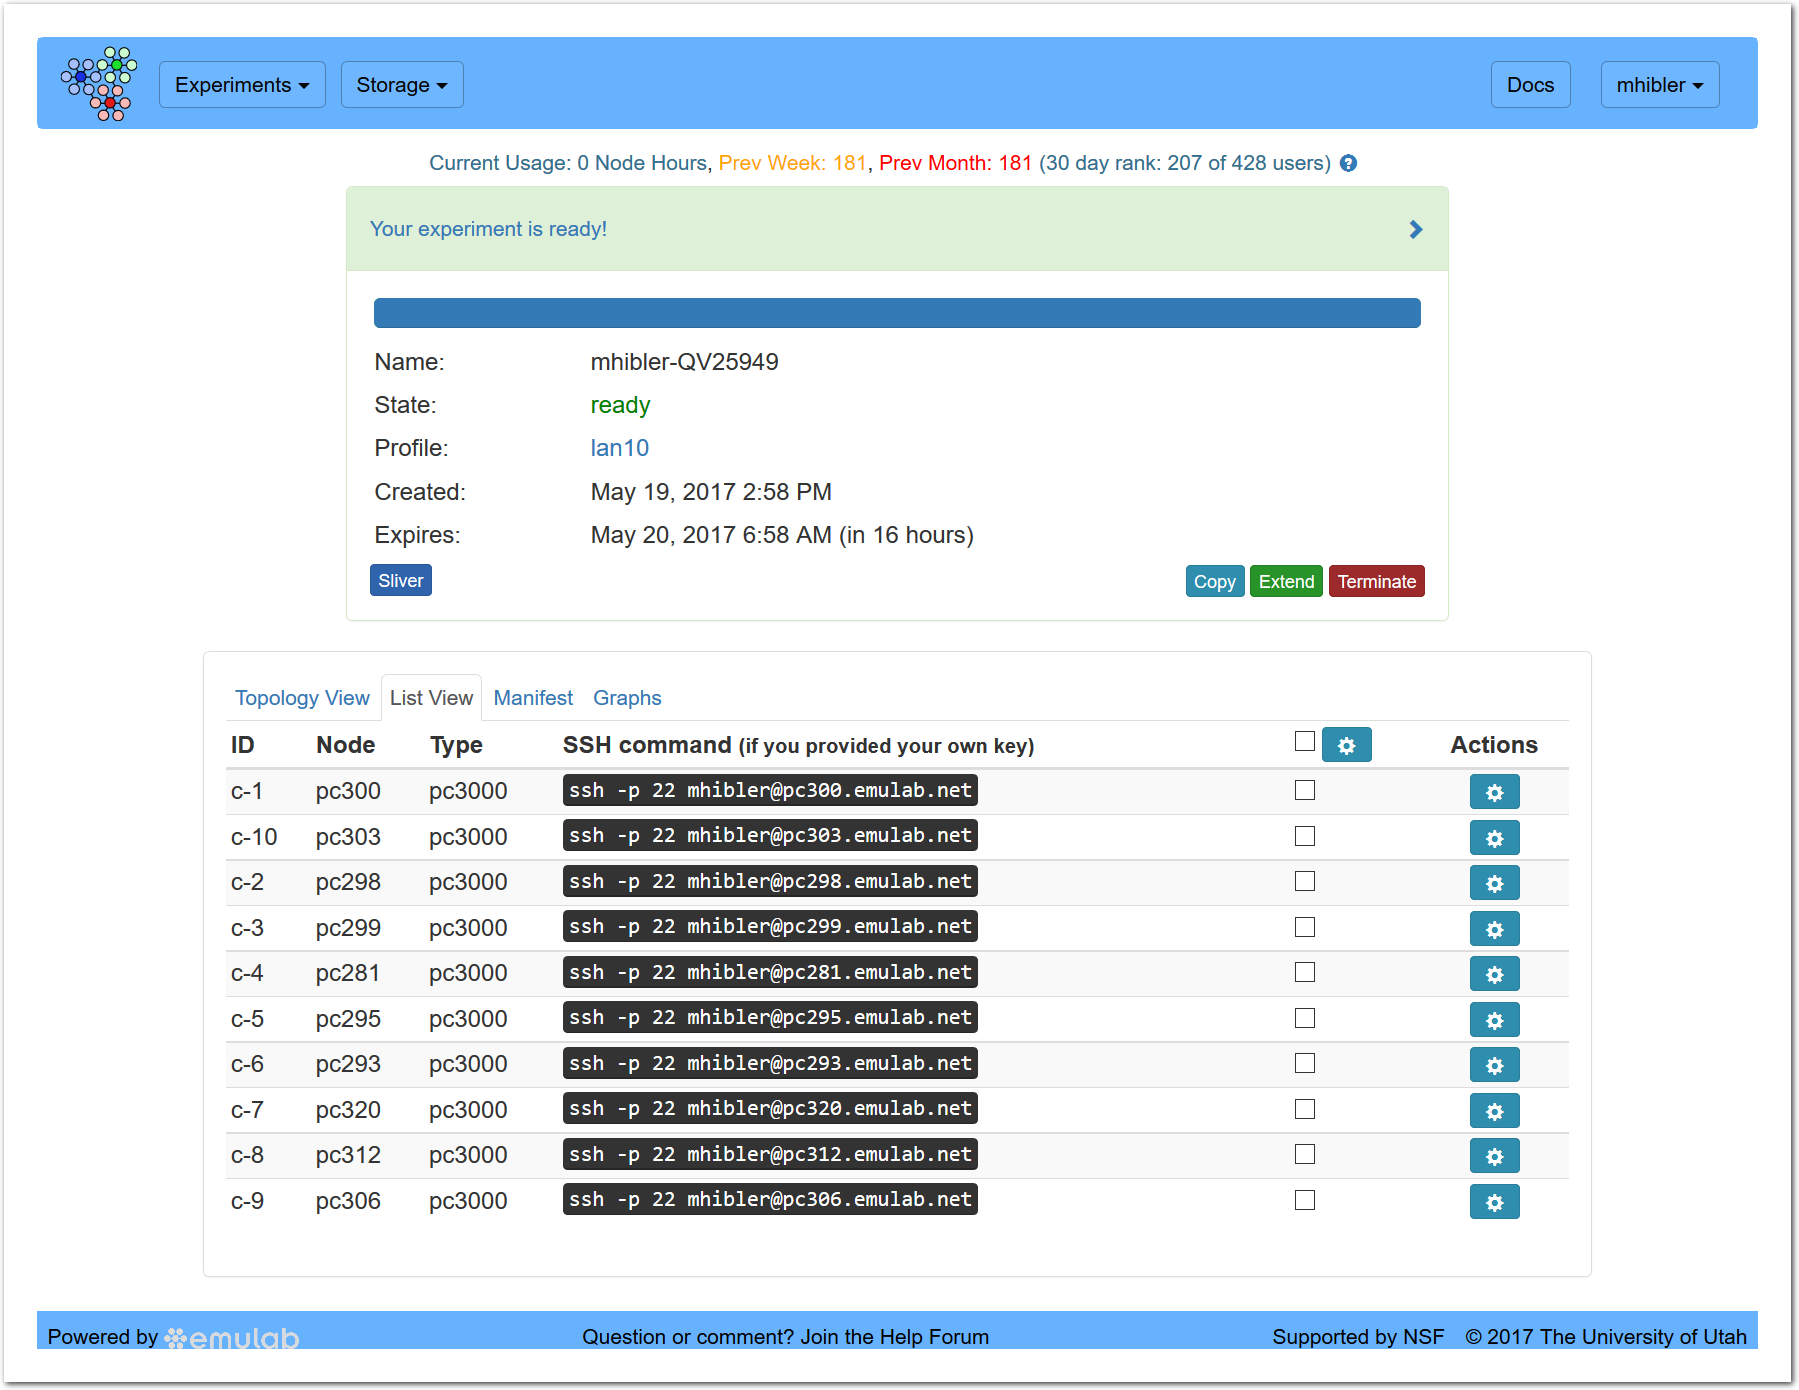
showing the node names and types as well as a per-node “Actions” menu for console, SSH, rebooting, etc. The settings drop down in the header allows you to perform certain actions (e.g., rebooting) on all selected nodes.
If you are nearing the expiration time for your experiment and need to keep it for longer, click on the green “Extend” button and then use the slider or “Requested” text box to choose an extension time. Keep in mind that an extension may not be possible or may require admin approval.
Once you are finished with your experiment, you can “swap out” the experiment using the red “Terminate” button. This destroys the instance but leaves the profile intact. If you want to terminate the experiment in the classic sense (getting rid of all traces of it), terminate the experiment and then go to the “Profiles” tab in your dashboard and delete (all versions of) the profile as well. Of course, you can only delete the profile if it belongs to you.